6 User Instructions
6.1 Vacancy Generation
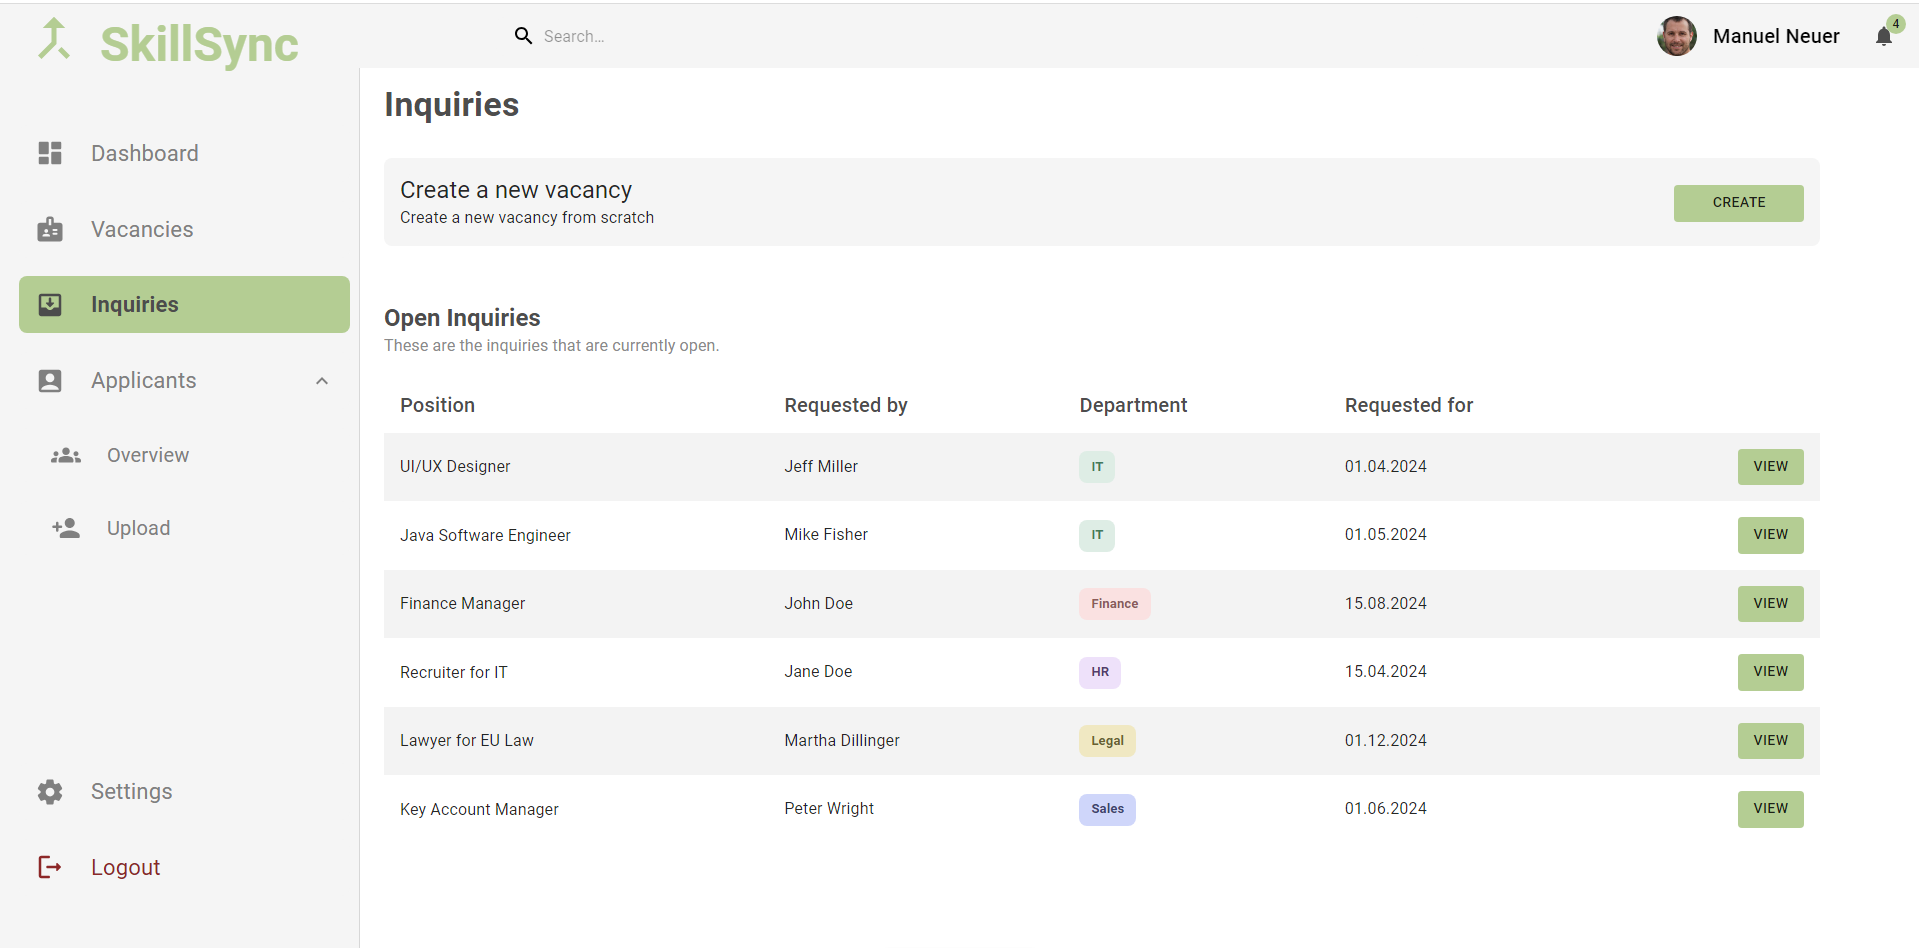
6.1.1 Step 1: Navigate to Inquiries
- Go to the “Inquiries” page on our platform.
- At the top of the page, find and click the “Create” button.
- Screenshot:
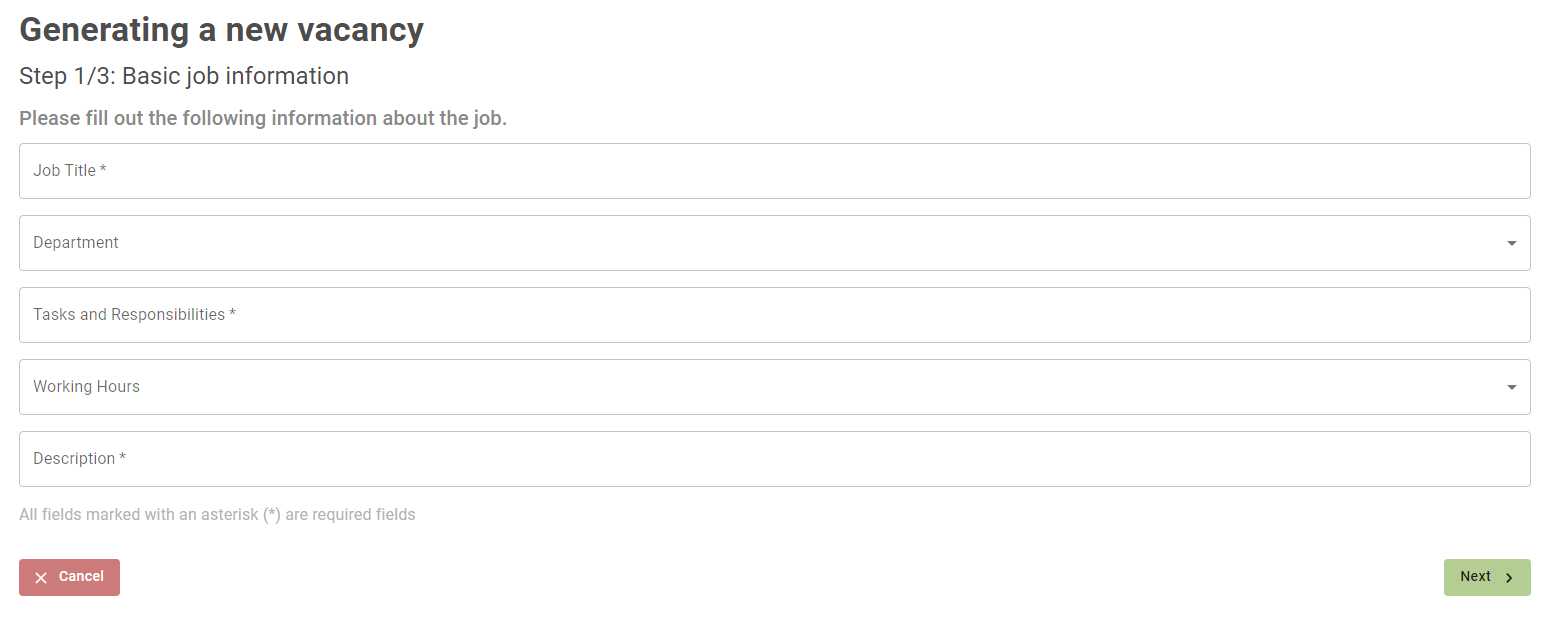
6.1.2 Step 2: Enter Basic Information
- You will be directed to a page to enter basic vacancy information. Fill in all fields:
- Job Title
- Department
- Tasks and Responsibilities: Brief points are sufficient as AI will enhance this section later.
- Working Hours
- Description
- Screenshot:
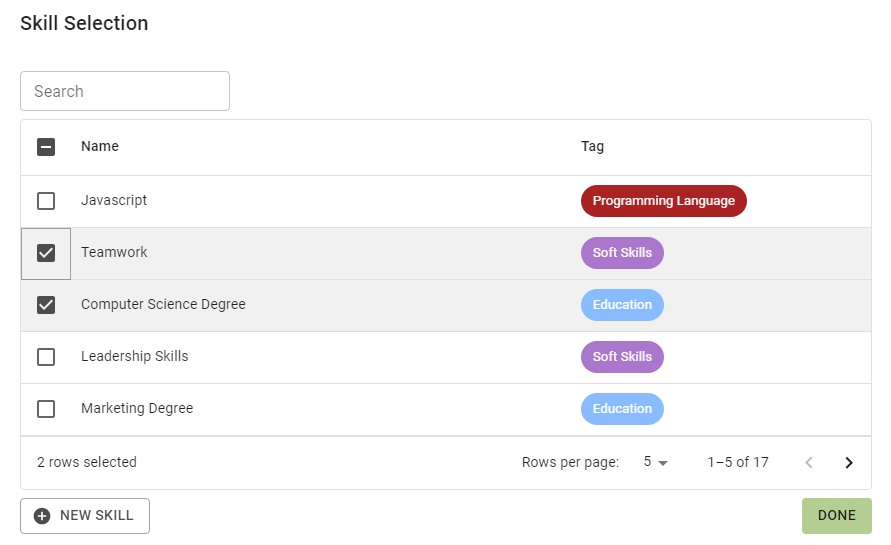
6.1.3 Step 3: Skill Selection
- Proceed to “Select Skills” and choose the necessary skills via checkboxes.
- To add a new skill, click the “New Skill” button and enter the skill name. The category and guidelines will be auto-generated.
- Screenshot:
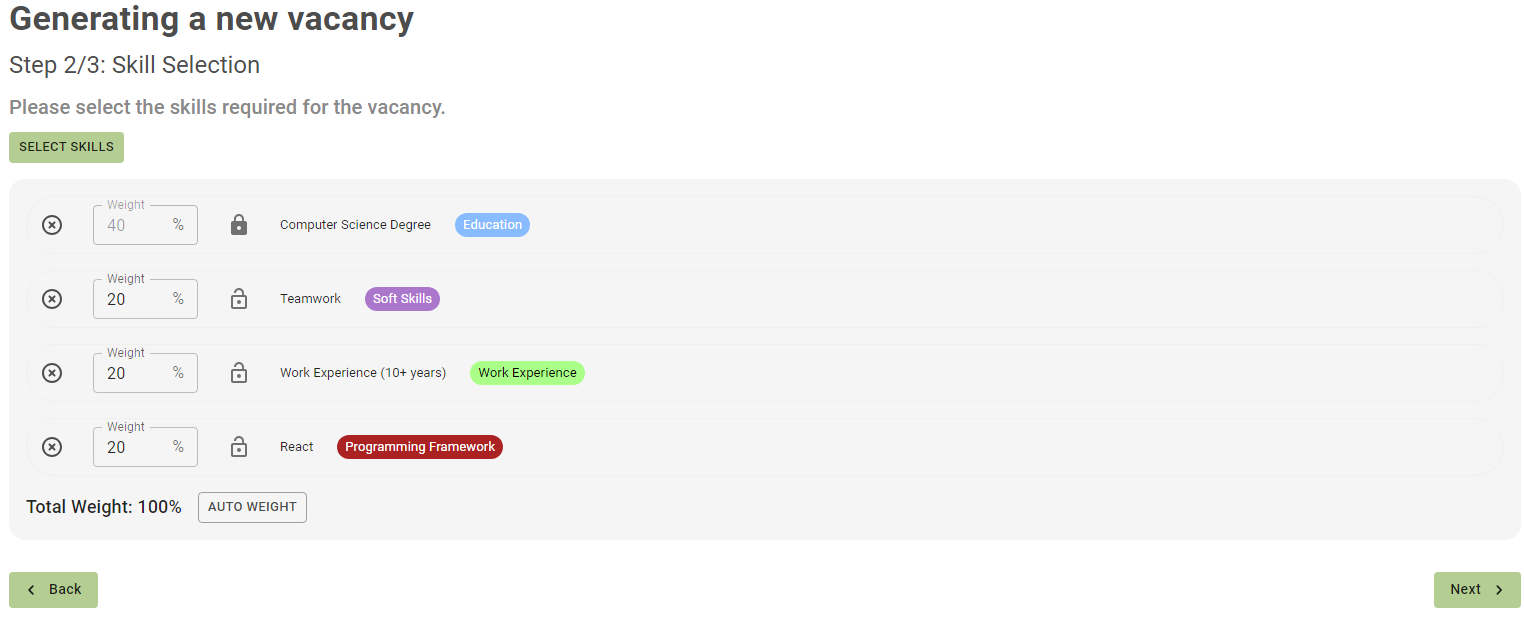
6.1.4 Step 4: Assigning Weights to Skills
- After selecting skills, assign weights to each, crucial for calculating applicant scores.
- Use “Auto Weight” for equal distribution or manually enter percentages and lock them.
- Screenshot:
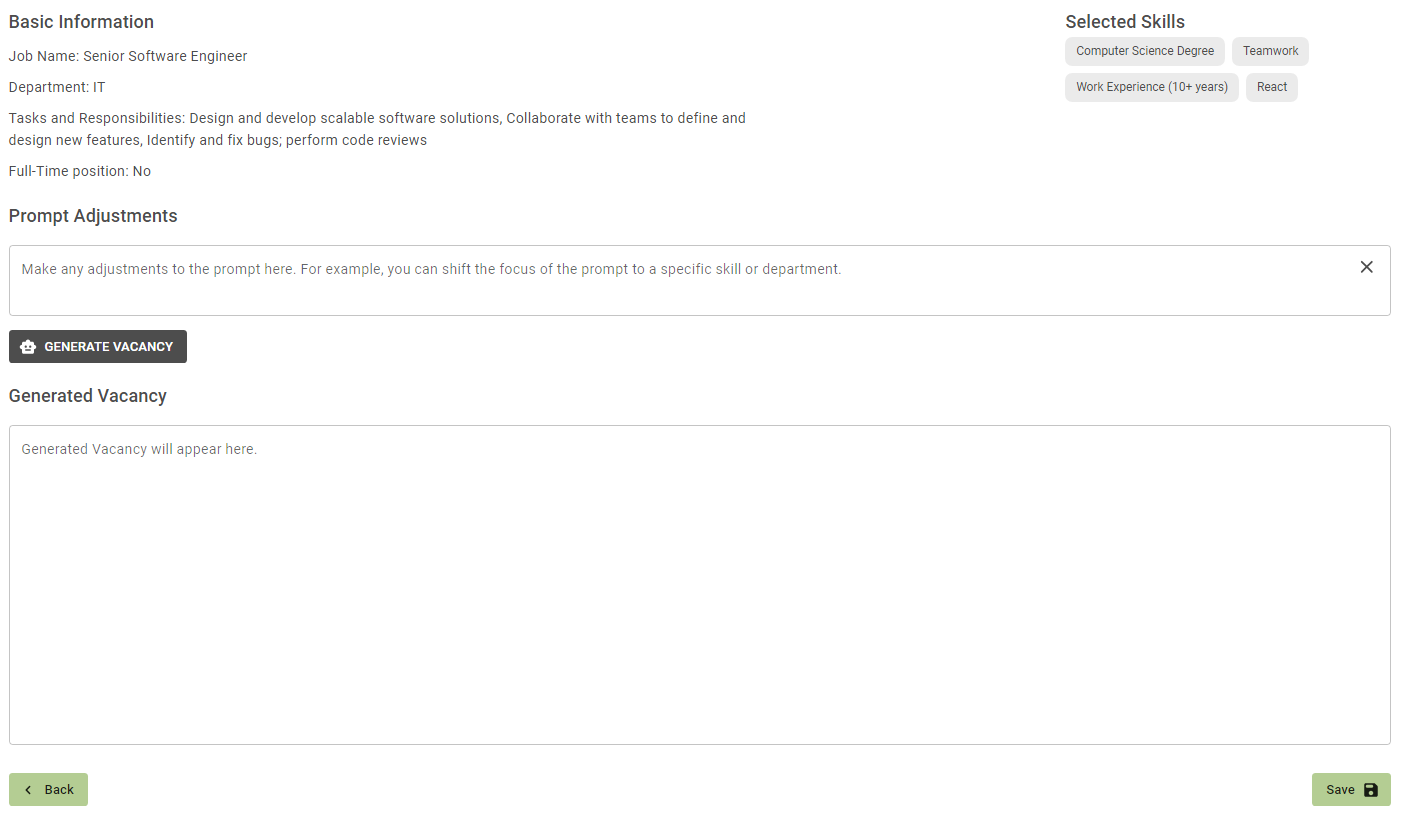
6.1.5 Step 5: Final Overview and Vacancy Text Generation
- Review all selected information and skills.
- Use “Generate” to create the vacancy text, modifying the prompt if necessary.
- Click “Save” to store the vacancy.
- Screenshot:
6.2 Uploading a New Applicant
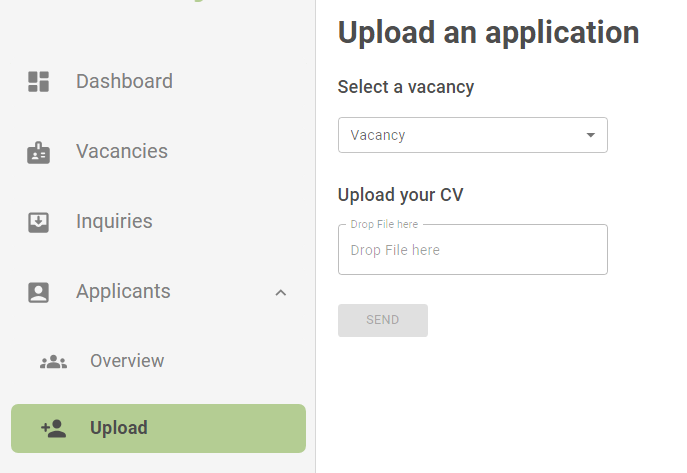
6.2.1 Step 1: Click Upload
- Click on “Upload” in the navigation bar.
- Select the vacancy for which you are uploading the CV.
6.2.2 Step 2: Upload CV
- Drag and drop your CV as a PDF into the designated window.
- Click the “Send” button to upload the applicant.
- Screenshot:
6.2.3 Step 3: Review Applicant
- Navigate to “Vacancies” in the navigation bar and select the relevant vacancy.
- All applicants for the vacancy will be listed; click on “Details” for the new applicant.
- Screenshot:

6.2.4 Step 4: Applicant Overview
- You will see a detailed overview of the applicant, including their total score and scores for individual categories.
- Justifications for the scores and quotes from the CV supporting these assessments are provided.
- Screenshot:
